
{{text}}
Share
Why do a 301 redirect on Webflow?
Make a 301 redirection on Webflow is essential for a number of reasons, including:
- preserve the user experience,
- maintain SEO referencing,
- effectively manage changes in the content or architecture of your site.
Discover our guide dedicated to all 301 redirects on Webflow by Synqro, our Webflow agency.
1. Preserving the user experience
When a page is deleted or moved, users trying to access it may encounter a 404 error. This can be frustrating and cause them to leave your site. A 301 redirect ensures that they are automatically redirected to the correct page, thus avoiding any interruption in their browsing.
2. Maintain SEO
Search engines like Google assign a certain weight to the URLs on your site based on their history and content. When a page is moved, a 301 redirect allows this weight and authority to be transferred to the new URL, thus maintaining the ranking of your site in the search results.
3. Manage content or architecture changes
As your site evolves, you may need to restructure its content or change some URLs to better reflect your offer or improve the organization of the site. Redirects allow you to make these changes without losing existing traffic or search engine indexing.
Definition of a 301 redirect
A 301 redirect is a permanent instruction telling search engines and browsers that a page has been permanently moved to a new URL. This redirection ensures that:
• Users are automatically directed to the new address.
• The referencing and authority of the initial page are maintained.
How do I do a 301 redirect on Webflow?
301 redirects are essential for redirecting visitors and search engines from an old URL to a new one. Here are the steps to set up a 301 redirect on Webflow.
Step 1: Access Project Settings
1. Connect to Webflow and open your project dashboard.
2. Click on the Settings tab for the project in question.
Step 2: Go to the Publishing tab
1. In the project settings, select the Publishing tab in the main menu.
Step 3: Set up 301 redirection
1. Scroll down to 301 Redirects.
2. In the first column, enter the URL you want to redirect (for example: /old-page).
3. In the second column, enter the new URL you want to link to (for example: /new-page).
Step 4: Save changes
1. Click Save Redirect to save the redirect.
2. Publish your site for the redirection to be effective.
And that's it, your 301 redirection is configured on Webflow!
Best practices for 301 redirects
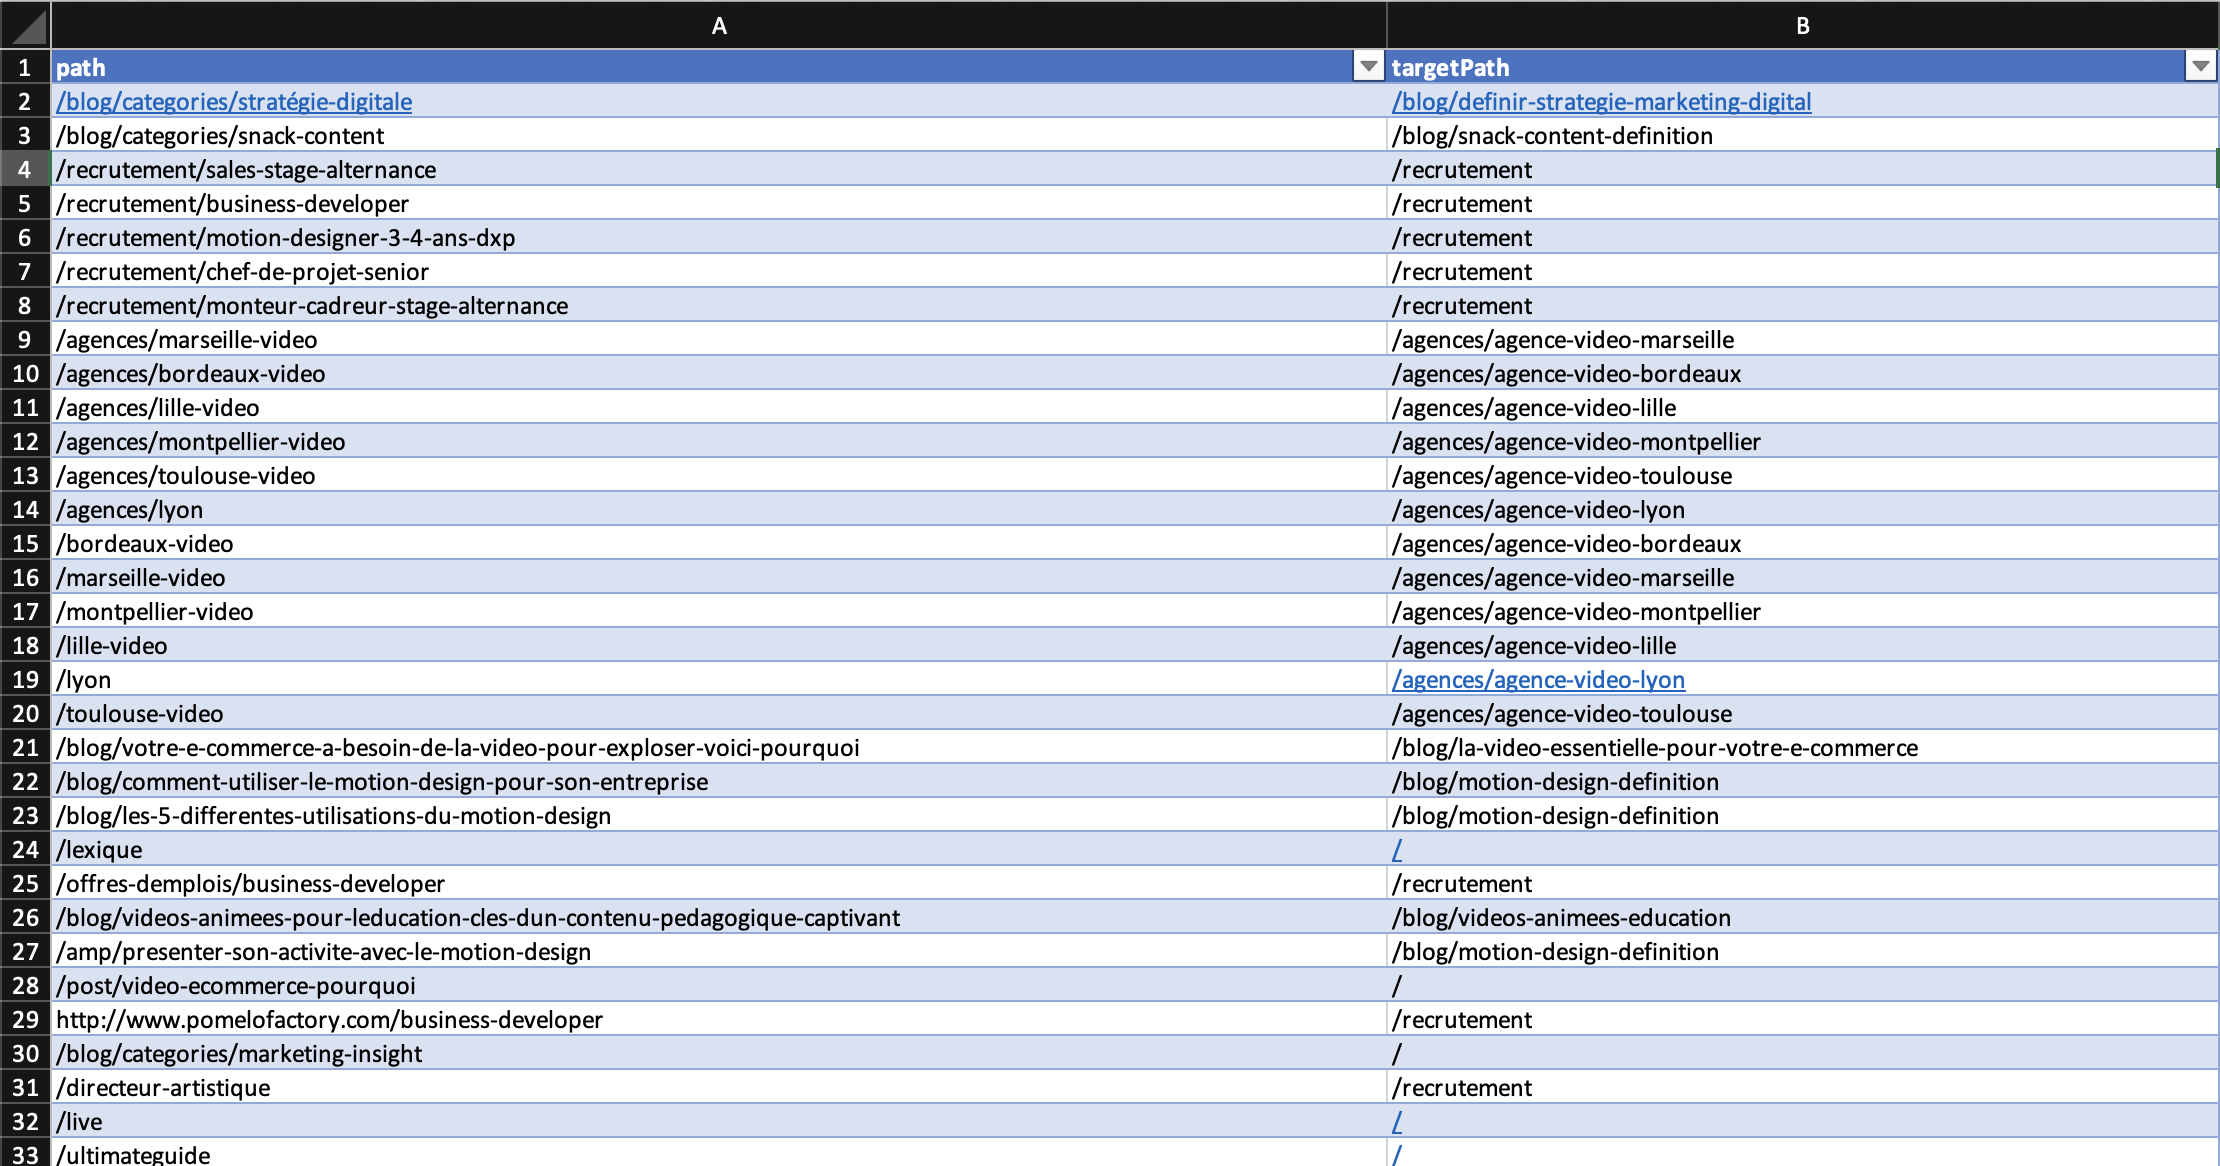
Establishing a structured redirection plan
Before setting up redirects, create a redirection plan with two columns:
• Old Path
• New Path
This helps avoid redirection loops and 404 errors.
Use the Finsweet extension for group redirects
The Finsweet extension for Webflow makes it easy to manage bulk redirects. You can import your redirection plan directly, which simplifies the process when there are a lot of URLs to redirect.

Specific cases of 301 redirects
Case 1: Redirecting a complete site (without changing slug or domain)
Redirecting an entire domain to your new site can be useful in the following situations:
1. You have changed your domain (example: agencewebflow.io → synqro.co).
2. You have reorganized the structure of your URLs.
3. You have replaced or redesigned your site.
4. You want to secure domain variants (example: synqro.com → synqro.co).
How to do it?
1. Go to the Publish tab in the site settings.
2. Add a custom domain.
3. Set the default domain to redirect all URLs from other domains to this one.
Case 2: Redirecting content to a new URL
When migrating content from an old site to a new one, use the 301 redirect to maintain your SEO.
Example of a redirection plan:
• Old path: /design
• New path: /agence-webdesign
⚠️ Avoid specifying the full URL, such as:
https://synqro.co/design → https://synqro.co/web-design.
Case 3: Redirection from one complete URL to another
When changing a business name or domain name, follow these steps:
1. Redirect the full domain first (see Case 1).
2. Then configure a classic 301 redirect by specifying only the relevant slugs.
Conclusion
This guide showed you how to:
• Establish an effective redirection plan.
• Use tools like the Finsweet extension for bulk redirects.
• Apply best practices for each type of redirection.
By following these steps, you will ensure a smooth transition for your users and search engines, while strengthening the consistency and performance of your Webflow site.
Synqro's latest achievement